This is a Complete Guide of Film for People New to Photography!
If you would like to read our simple guide on choosing the right film for your needs and camera, check out our guide here
Starting shooting film can be overwhelming, Film is a very complex thing, and while it and digital both result with a picture, the process is very different.
This guide will educate you on the different formats, types of film and a little bit on the science behind it.
Chapters:
1. What is photographic film
2. Understanding film formats
3. Choosing the right film
4. Developing Film
5. Scanning and printing
Chapter 1. What is photographic film?
Photographic film is a light-sensitive material that is used to capture and record images. Unlike digital photography, which records images electronically, film photography relies on chemical reactions to produce a visible image.
First Invented in the 19th century, Photographic film is a light-sensitive material used to capture images. Film is made up of a thin, flexible plastic base coated with a layer of light-sensitive emulsion that contains silver halide crystals, suspended in gelatine. When exposed to light, the silver halide crystals react chemically and form a latent image on the film. This latent image is then developed into a visible image through a chemical process.
Photographic film is made through a process that involves several steps. Here is a breakdown of the process:
-
Coating the Base: The first step is to coat the base material with a layer of gelatin or other similar substance. The base material is usually a thin, flexible plastic material such as polyester or acetate. The coating helps to hold the light-sensitive emulsion layer in place.
-
Applying the Emulsion: Once the base material is coated, the next step is to apply the light-sensitive emulsion layer. The emulsion layer is made up of silver halide crystals suspended in the gelatine or similar binder. The emulsion layer is applied to the coated base material using a coating machine, which ensures an even distribution of the emulsion layer.
-
Sensitising the Emulsion: After the emulsion layer is applied, it is then sensitised to light. This involves adding a small amount of sensitising dyes to the emulsion layer. The sensitising dyes help to improve the film's sensitivity to different colours of light.
-
Drying the Film: Once the emulsion layer is sensitized, the film is dried. This is typically done in a dark room to prevent any accidental exposure to light. The drying process helps to remove any excess moisture and to set the emulsion layer in place.
- Cutting and Packaging: Once the film is dry, it is cut into individual sheets or rolls and packaged. The packaging is designed to protect the film from light, moisture, and other environmental factors that could affect its sensitivity.
Chapter 2. Understanding Film Formats
The film format refers to the size and shape of the photographic film used. There are many different formats each with their own qualities such as image size, resolution, and aspect ratio.
35mm Film

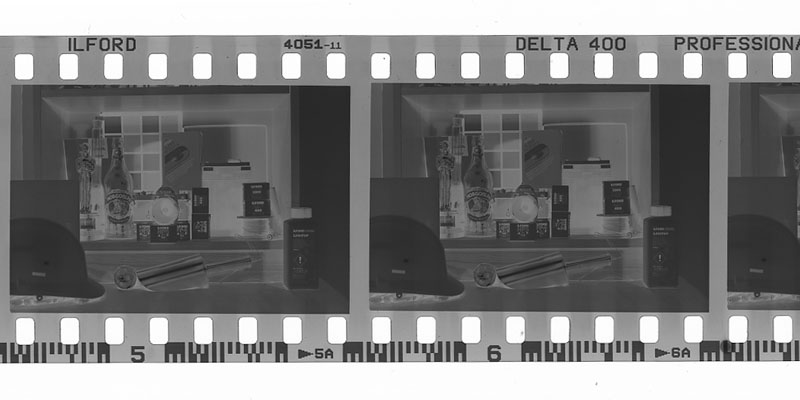
35mm film is the most popular film format, and is used by 99% of film photographers. It gets its name (35mm) from the size of the film canister. It's a small format, with a negative/positive measuring 24mm by 36mm. 35mm film is convenient to use, easy to find, and relatively affordable. The majority of rolls contain 24 or 36 exposures.This is the most versatile format of film available combining excellent image quality with good portability.
Medium Format Film (120 Film)

Medium format film is larger than 35mm film, measuring 61mm in width. This larger size produces higher resolution images with greater detail. It originally got its name because it was the 20th daylight-loading roll film (on flanged spools) that Kodak produced. 120 films larger size makes it a popular choice for professional and fine art photography. Medium format cameras are typically more expensive than 35mm cameras, and the film is more expensive as well.
Large Format Film

Large format film is the largest film format available, with image sizes ranging from 4x5inch going all the way up to life-size
It is sold in large sheets arranged into boxes. You need a specialist large format camera for this film. These cameras are typically bulky and heavy, and they require a higher degree of technical skill to operate. However, they offer unparalleled image quality, resolution, and detail, making them a popular choice for fine art photography and commercial work. if you are interested in learning more there's a video here!
Discontinued/hard to find film formats
Advanced Photo System (APS) Film - This film was created in a collaboration between film manufacturers to replace 35mm film. The main difference between this and 35mm film was APS film had a smaller image size and allowed information, such as camera settings to be recorded on the film via a magnetic coating on the film. This was obviously a failure due to the smaller image size and the complexity to develop it.
110 - 110 film was a popular format in the 1970s and 1980s. It was a small-format cartridge film that was easy to use and popular for snapshot photography. It allowed for incredibly small cameras but it lost popularity due to the smaller image size. You can still buy Lomography branded 110 film cartridges.
126 - 126 film was similar to 110 film, but with larger negatives. It was also a cartridge format, but was not as popular as 110.
Disc film - Disc film was a format that was introduced in the 1980s. It used a circular disc of film with 15 exposures, and was popular for point-and-shoot cameras. However, it had poor image quality and was quickly phased out.
220 film - 220 film is very similar to 120 film, however it does not have backing paper. This allowed for twice the amount of photos per roll compared to 120.
Chapter 3: Understanding film types
To understand the type of film you are buying you must understand these 3 things
1. Negative vs Reversal
2. Film Speed
3. C41 vs B&W vs E6
Negative vs Reversal
NEGATIVE FILM: This film captures images as a “negative”, in which the colours and values are inverted. Great for preserving details in high-contrast situations. It also tends to have a lot more forgiveness when it comes to over and under-exposure
REVERSAL FILM: Also known as “slide film or positive film”, it captures images as a “positive”, replicating the colour and values directly. Because of this, it captures a rich range of colours. It’s also quite clear, with less grain than negative film.
ISO - LIGHT SENSITIVITY - FILM SPEED
Film speed refers to the film's sensitivity to light, and is measured using the ISO (International Organisation for Standardisation) scale. The ISO scale ranges from 25 to 6400 or higher, with lower numbers indicating less sensitivity to light and higher numbers indicating greater sensitivity.
For example, a film with a speed of ISO 100 is less sensitive to light than a film with a speed of ISO 400. A film with a higher ISO rating will require less light to create a properly exposed image, making it suitable for use in low-light conditions or situations where a fast shutter speed is needed to freeze motion.
In addition to affecting exposure, film speed also impacts image quality. Films with higher ISO ratings tend to produce more grain or noise in the image, while lower ISO films produce smoother, more detailed images.
Overall, the choice of film speed and ISO setting depends on the lighting conditions, desired image quality, and shooting conditions. Photographers may choose to use a higher ISO film for low-light situations or a lower ISO film for situations where image quality is a priority.
If you have a compact camera you probably don't need to worry about setting the ISO as your camera will set it automatically by reading the dx code (a barcode on the film canister), but for an many SLRs you will need to set this manually every time you put a new roll of film in.
A Good way to decide what ISO you need is by using this guide:
100-200 ISO films - Sunny days
200-400 ISO films - Semi-cloudy days and indoor flash photography
400-800 ISO films - Cloudy days, indoor flash, and low light photography
800-3200 ISO films - Low light situations, sports, fast-moving subjects
FILM TYPES
There are 3 main types of films on sale nowadays, each named after the chemicals used to develop it
1. C41
2. E6
3. Black and white
C41 Film
C41 film is a type of film that uses a negative-to-positive process. This means that the film produces a negative image that needs to be printed onto photographic paper to produce a positive image. C41 film is developed using the C41 process, which is a simpler and more forgiving chemical process than E6. C41 film produces more muted colours and lower contrast than E6 film, but it is easier and less expensive to develop. Anywhere you go that develops film, this is what they'll be primarily working with.
E6 Film
E6 film is a type of colour slide film that uses a positive-to-positive process. This means that the film produces a positive image that can be directly viewed or projected without the need for printing. E6 film is developed using the E6 chemical process, which is a complex and precise chemical process that requires specific temperature control and timing. E6 film is known for its high colour saturation, contrast, and sharpness, making it popular among photographers who want to create vibrant, eye-catching images.
Black and White
Black and white film, as the name suggests, produces images in shades of black, white, and grey. Black and white film can be developed using a variety of processes, including traditional darkroom techniques and digital scanning. The development process for black and white film is typically more involved and requires more precise temperature control than C41 film, but it is still simpler and more forgiving than the E6 process.
Chapter 4: Developing Film
Developing film is the process of chemically processing the exposed film to reveal the latent image captured on the film. It's a complicated process involving many steps, including developing, stopping, fixing, and washing the film. While developing film can be a complex and technical process, it can also be a rewarding and creative part of the photographic process.
Lab development depending on the machine is an automated process, however you can also develop manually at home.
To develop film at home, you'll need several pieces of equipment and materials, including:
- Developing tank: a light-tight container for holding the film and processing chemicals
- Developing reel: a spiral metal or plastic reel for winding the film onto
- Developer: a chemical solution that converts the exposed silver halide crystals on the film into visible silver particles
- Stop bath: a chemical solution that stops the development process
- Fixer: a chemical solution that dissolves the unexposed silver halide crystals on the film and stabilises the visible silver particles
- Film clips or hangers: for hanging the film to dry
- Darkroom equipment: including an enlarger, easel, and trays for printing the developed film. This can also be performed with a digital scanner or DSLR scan setup
Developing Process
The developing process involves several steps, including:
- Loading the film onto the developing reel and placing it into the developing tank.
- Adding developer to the tank and agitating the tank for the specified time.
- Adding the stop bath to the tank to stop the development process, and agitating the tank for the specified time.
- Adding the fixer to the tank and agitating for the specified time.
- Removing the film from the tank and washing it thoroughly with water to remove any remaining fixer.
- Drying the film either by clips or in a drying cabinet
It's important to follow the manufacturer's instructions for the specific film and chemicals being used, as developing times and temperatures can vary depending on the type of film and chemicals.
Chapter 5: Scanning and Printing
The final stage in the development process, scanning and printing, allows you to turn your physical negatives into digital or printed images to share or display.
Scanning Film:
When scanning film, there are several options for equipment, including dedicated film scanners, flatbed scanners with film holders, DSLR scanning and specialised services. Dedicated film scanners are typically the best option for producing high-quality scans, but can be expensive. Flatbed scanners with film holders are a more affordable option, but may not produce as high-quality scans. A new advance in the scanning field is to use a DSLR, macro lens and a tripod. You then place your film in a scanning mask above a lightbox and take close-up photographs of your negatives.
Printing Film:
When printing film, you have the option of using a traditional darkroom or a digital printer.
In a darkroom, you use an enlarger to project the image onto light-sensitive paper, which is then developed using traditional chemicals. This process can be time-consuming and requires a dedicated space, but can be very rewarding and produce unique, high-quality prints.
Digital printing, on the other hand, allows you to print your images directly from your scanned negatives using a digital printer. This method is quicker and more convenient, but may not produce the same level of quality as a darkroom print.
-
Thank you for reading our beginner guide, we plan on creating more in depth deep dives expanding on the subjects we touch on in this guide. In the mean time if you have any questions, please let us know and drop us a message here!